
Tips and Tricks
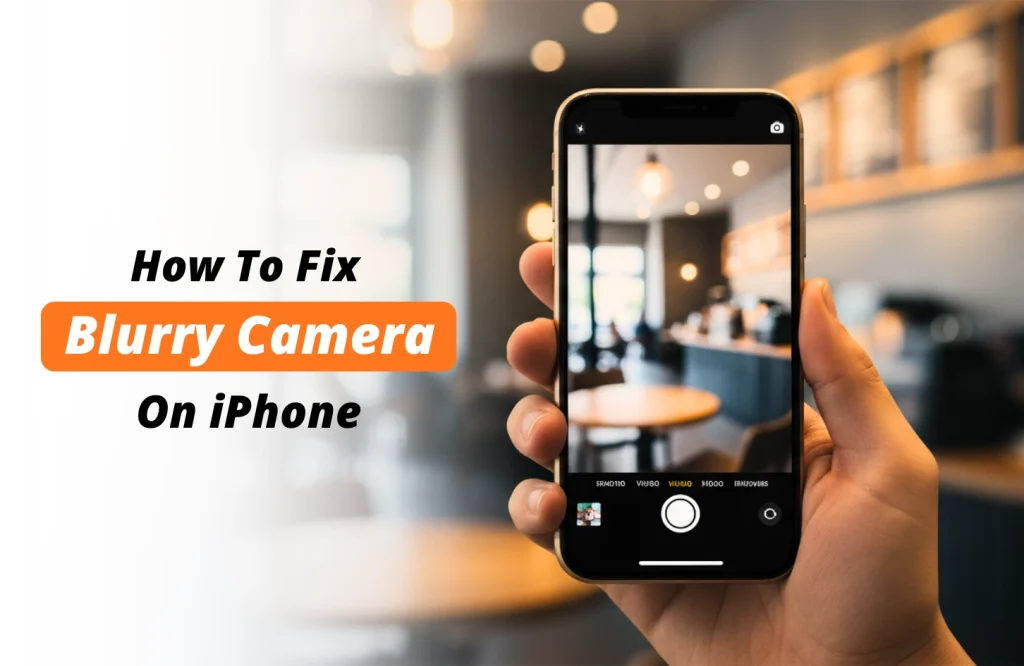
How To Fix iPhone Blurry Camera?
iPhones are known for their stunning imagery capabilities, and it won’t be overstating if we say they’ve set the benchmark for smartphone photography. However, many users have faced the frustrating issue of their iPhone camera suddenly going blurry or refusing to focus.
If your iPhone photos are turning out blurry, don’t panic; this is more common than you think. Reports of blurred corners and soft images, especially since the iPhone 13 line, have sparked discussions about reused sensors and depth-related issues.
In this guide, we’ll walk through a few simple, tried-and-tested fixes for blurry camera on iPhone you can try right at home before rushing to a repair shop.
These quick steps can often bring your camera back to perfect clarity — and if not, we’ll help you figure out when it’s time to get professional help.
Let’s dive in and get that iPhone camera back to focus –
Why is My iPhone Camera Blurry and Not Focusing?
You may find your iPhone camera (front or back) not focusing properly either when taking a shot or after as you revisit them from the “Photos” app.
Sure, Apple lets you refocus in editing, but that’s just a quick patch and won’t help much if light scattering or lens issues are to blame.
To truly fix it, start with the basics — check the hardware, try a few software tweaks, and if nothing works, time for the pros to step in.
Physical Troubleshooting
Physical troubleshooting for unfocused images of iPhone revolved around checking for any scratch or fingerprint on the lens, dirt/liquid getting inside the phone and checking the camera module for physical damage or dislodging.
You can skip to the Software Troubleshooting part if you’ve done these already.
Solution 1 – Check for Lens Issues
Isolating The Blurry Lens
Even a repair technician cannot fix a camera without first isolating the faulty module. Test each lens one by one at 1X, then move through the preset zoom steps for that module, such as 1.5X, 2X, 2.5X and 3X.
Many users report the phone auto switching to Macro at extreme close range, which can add edge blur while the centre stays sharp.
Start at 1X, then check the preset zoom stops for macro, wide and tele. If those preset levels show blur across modes, it may indicate a software or processing problem rather than a simple smudge.
Smudge or Condensation
Dirt, fingerprints, tiny droplets or a cracked lens scatter light and ruin focus. If you find any of these, try the steps below.
- Wipe the lens with a clean microfiber cloth using gentle circular strokes from centre outward.
- If needed, lightly dampen the cloth with distilled water only
- Do not use paper towels or harsh cleaners that strip coatings
- If minimal condensation appears, place the phone in a sealed desiccant bag or a dry, ventilated spot to evaporate moisture
- Visible scratches or cracks mean the camera module needs replacement by an authorised technician
Solution 2 – Visual Obstructions
Using a premium, padded case can significantly enhance a phone’s life, but cheap knock-offs can easily misfit on your smartphone and block important components like depth sensor / LiDAR leading to blurry images.
Cheap iPhone covers with magnetic components often interfere with the camera’s parts along with other components as well, like the OIS module.
Remove any case, mount or screen protector that overlaps the lens and retest
- Try photos without the case to check if that’s the issue
- Replace ill fitting cases with ones that have a raised camera rim
- Avoid magnetic mounts that sit near the camera or LiDAR area
Solution 3 – Watch for OIS Damage
Optical image stabilization can dislodge after heavy drops or prolonged vibration (for example, using OIS in video while biking), and lead to causing constant shake or rattling.
If you see the camera physically moving or hear unusual noises, Stop Using DIY Fixes.
- Signs to note: visible sensor movement, rattling sounds, or images that look like they were taken while the phone is shaking.
- Action to take: back up your data and book a repair with Apple Gadgets Care or an Apple authorised repair shop for a camera module or OIS replacement.
Software Troubleshooting
To troubleshoot blurred shots from a software-end, the primary goal is to trace it down; whether the issue stems from a temporary app glitch, incorrect camera settings, or outdated software.
Most of the time, blurry or unfocused images are caused not by hardware failure but by the camera app freezing, certain modes like HDR or Macro misbehaving, or iOS bugs interfering with image processing.
We’ll start simple, moving from quick app resets to broader system-level fixes. Try these steps in order, and you might just get your iPhone camera snapping sharp again!
Solution 4 – Fix Camera App Glitches and Mode Conflicts
The camera app itself can sometimes malfunction and result in poor focus in photos or videos. Thoroughly checking the native camera app of your iPhone for bugs and refreshing corrupted cache often solves the issue instantly.
Otherwise, resetting the Camera settings (or an entire System Settings reset) gives a complete refresh of how your iPhone processes images and eliminates any hidden error. Try these methods.
Try the steps below to quickly check your native app for any hidden problem –
Step 1: Force Closing & Reopening the Camera App
- On iPhones with Face ID: Swipe up from the bottom and pause mid-screen
- On iPhones with a Home Button: Press the Home Button twice
- From all the running apps, find the Camera preview and swipe it up to close.
- Wait for 10 – 15 seconds, then reopen the app from the Home Screen (not Control Center).
This clears the cached data and often restores the iPhone’s focus function instantly.
Step 2: Test in Apple’s Native Camera App
If you mostly use third-party apps like Snapchat or Facebook for taking images, you should test the focus from your iPhone’s built-in camera app first. Because most third-part apps accessing your camera compress file size or don’t leverage the iPhone’s camera full functionalities.
If the blur disappears in the native camera app but appears in the third party app(s), you know who’s the culprit.
- Open the native Camera app in your iPhone
- Take a few shots and videos with both front & rear camera
- Compare results with the third-part app in consideration
If blurring occurs only in the non-native app’s camera, reinstall or update it
Step 3. Disable Macro, HDR, and Live Photo
Sometimes, your camera isn’t misbehaving, but the settings in it are just “overhelping”. Some smart features in the camera settings automatically adjust for things like depth and light, but can misfire, especially in low-light or close-up shots.
- Go to Settings → Camera.
- Find added options you want to disable (Macro, Smart HDR, Live Photo etc.)
- Toggle the intended features “off”
- Reopen camera and test various at different distances
If you see clear differences, one of the features was interfering with focus. Toggle on-by-one and pinpoint the culprit.
Step 4. Reset Camera Settings
If all fails, resetting the camera’s preferences can give a clean restart. Don’t worry, your photos won’t be deleted.
What this step does is resetting some preferences and permissions like modes, filters, frame rate, display & brightness, and network permissions. Here’s what to do –
- Go to Settings → Camera → Preserve Settings
- Tap Reset All Settings
- Provide your passcode to apply the reset
This one is different from resetting the entire phone or factory reset, so all of your files (photos, videos, contacts etc.) remain untouched.
Once done, reopen the camera app and check for improvement. This step is well-known for its high success rate in long-term focus issues related to corrupted camera configurations.
Solution 5 – Restart, Reset, or Update Your iPhone
These are the most common DIY iPhone Camera Problem fixes for issues like black camera interface, blurry shots or other software glitches. Follow the steps in order to avoid extra hassle. That way, if you ultimately visit a technician, you’ll already have a clear “medical history” for your phone; helping them diagnose faster and give you a quick turnaround in repair.
Step 1: Restart Your iPhone
Restarting helps, because it clears temporary files that may have been corrupted or is interfering with new files after update.
On iPhone 8 and newer –
- Quickly press and release the Volume Up button.
- Quickly press and release the Volume Down button.
- Press and hold the Side button until the Apple logo appears.
On iPhone 7 and 7 Plus –
- Hold the Volume Down and Sleep/Wake buttons together.
- Keep holding until the Apple logo appears.
On iPhone 6s and older:
- Press & hold the Home and Sleep/Wake buttons together.
- Release when Apple Logo appears on screen.
After restarting, check and see if the blurry camera issue has been solved. If now, move forward with the next step, resetting your iPhone –
Step 2: Reset Your iPhone
If your camera still acts up after restarting, resetting all settings can clear corrupted system preferences and restore the focus accuracy. Resetting the entire iPhone is pretty similar to the camera settings reset we tried – and it doesn’t delete your personal data.
However, complete reset removes the following system info, so backup these first as you’ll be needing them right after this step.
- Important Wi-Fi passwords
- Screenshot of custom settings
- Ensure your iCloud backup is up to date
Steps to Reset All Settings in iPhone:
- Go to Settings > General > Transfer or Reset iPhone.
- Tap Reset.
- Choose Reset All Settings.
- Enter your passcode (if asked) and confirm.
Step 3: Update The iPhone’s iOS
Almost all smartphone manufacturers release software and OS related updates periodically, which come with fixes and patches for software bugs.
Standard updating of iOS doesn’t delete any data, but it’s wise to sync your personal data to iCloud beforehand; so if anything unwanted like a power loss or technical issues occur during the process, you can restore it to the exact same state as before the update.
Before updating –
- Back up your iPhone to iCloud (or your computer).
- Ensure you have at least 50% battery life (or plug it into a charger).
- Connect to a stable Wi-Fi zone for uninterrupted download and setup of iOS.
To update iOS:
- Go to Settings > General > Software Update.
- Check for update availability.
- If an update is available, click to Download and Install.
- Follow the on-screen instructions.
- Your iPhone can take several restarts to complete the process.
After the update: Test your camera focus for photos and videos in different modes – Macro, Tele, HDR, Portrait, etc. Also try zooming and switching between lenses, front and rear camera to notice any inconsistencies.
If you see no update is available, your system may already have the latest patches installed. In that case, move to seek professional help.
Solution 6 – Roll Back or Reinstall iOS
If your iPhone camera is blurry after an update, it could be due to a faulty iOS build or a software conflict. Rolling back or reinstalling iOS often fixes it completely. The good thing is, if you’re a tech-savvy mind and patient enough, you can perform this method by yourself from a MacBook or Windows PC.
It will not just save you diagnosis costs but also confirm that you’ve tried every home remedy before heading to a technician.
Warning:
- This process may DETELE ALL DATA and RESET your iPhone.
- FULLY BACKUP your phone to avoid PERMANENT DATA LOSS.
For macOS users (using Finder):
- Connect your iPhone to your Mac using a lightning or USB-C cable.
- Open Finder and select your device from the sidebar.
- Click General and then select Back Up Now to create a full backup.
- Once the backup is done, click Restore iPhone.
- Confirm when prompted. (At this stage your device gets wiped off of the previous iOS and installs the latest stable version of iOS)
- When complete, select Restore from Backup to get your data back.
For Windows users (using iTunes):
- Install or open the latest version of iTunes.
- Connect your iPhone via cable and select it from the top bar.
- Under Summary, click Back Up Now.
- Once the backup is finished, click Restore iPhone.
- iTunes will download and reinstall the latest iOS version automatically.
- After setup, choose Restore Backup to recover your data.
If you want to roll back (downgrade) iOS manually:
First, download the previous iOS version (IPSW file) compatible with your iPhone model from a trusted source like ipsw.me. Follow the steps to manually install iOS on your iPhone:
- Connect your iPhone to your computer.
- On Mac, open Finder; on Windows, open iTunes.
- Hold Option (Mac) or Shift (Windows) and click Restore iPhone.
- Select the downloaded IPSW file.
- Wait while the older iOS installs and your iPhone restarts.
- Finally, restore your data from the backup you created earlier.
Tip: If blurring persists even after a clean iOS upgrade or downgrade, it’s almost certainly a hardware or lens module issue — time to visit an expert Apple technician.
Camera Still Not Focusing Right? Let’s Fix It for Real
If you’ve already tried the 6 fixes above and your iPhone camera still can’t capture sharp, clean images, it’s likely not a software glitch anymore. At this stage, a professional diagnosis is your best bet.
Here are the most common signs that your iPhone needs expert attention:
- Visible scratches or cracks on the camera lens or module
- Condensation or dirt trapped inside the lens area
- Rattling or shaking sounds from the camera when moving the phone
- Consistent blur or soft focus in a specific area of every photo
- Persistent blur across all apps, even after full resets and updates
If you notice any of these, it’s time to hand things over to professionals.
At Apple Gadgets Care, we’ve been working on Apple devices since the early iPod era (long before Face ID or triple lenses were even a thing). Our technicians use advanced diagnostic tools and years of experience to pinpoint exactly what’s wrong, whether it’s the lens assembly, sensor shift mechanism, or internal circuitry.
We pride ourselves on a fast yet meticulous repair process, refined through years of Apple-specific expertise. Every diagnosis is explained clearly before any repair begins, so you know exactly what’s being fixed and what you’re paying for.
Your iPhone camera deserves precision care, and that’s exactly what we deliver; with authentic parts, quickest Apple repair in BD, and trusted craftsmanship.
Wrapping Up
iPhones have long set the gold standard for smartphone photography, but even the best can falter. A small fall, a splash of water, or a stubborn software glitch can suddenly turn crystal clear shots into blurry ones.
The good news is that many of these problems can be fixed right at home with patience and the right steps. Before assuming the worst, always start with simple, practical remedies.
For deeper issues, customer focused repair centers like Apple Gadgets Care offer free consultations over phone and guided DIY help for Apple users across Bangladesh. Make use of these resources to save your valuable time and hard-earned money!
Thanks for sticking around. We hope this guide helped you find your way, if not fully fix the issue. Until next time, keep exploring as we unpack something new, always within the world of tech.

Ifrad Mahbub is a tech enthusiast with more than two years of experience in writing about cutting-edge smart gadgets, cameras, and computers. He is passionate about exploring new technologies and engaging with like-minded professionals on the future of digital trends.